Dependencies
Login to Nhost
If you used GitHub to register, you will have to first set a password in your account page.
Initialize local project
Let’s start by creating a directory to hold your project.nhost init creates all the configuration necessary for your project, including database migrations and Hasura metadata.
We can now start your project with nhost up.
nhost down at any time to tear down your environment.
Access your project’s services
To test that the services are running, let’s curl the Auth endpoint and get its version:psql (or your favourite Postgres client).
Database Migrations and Metadata Changes
All changes to your project should be tested locally first before deploying to your users. In this guide, we will be creating a database migration and setting permissions.Migration
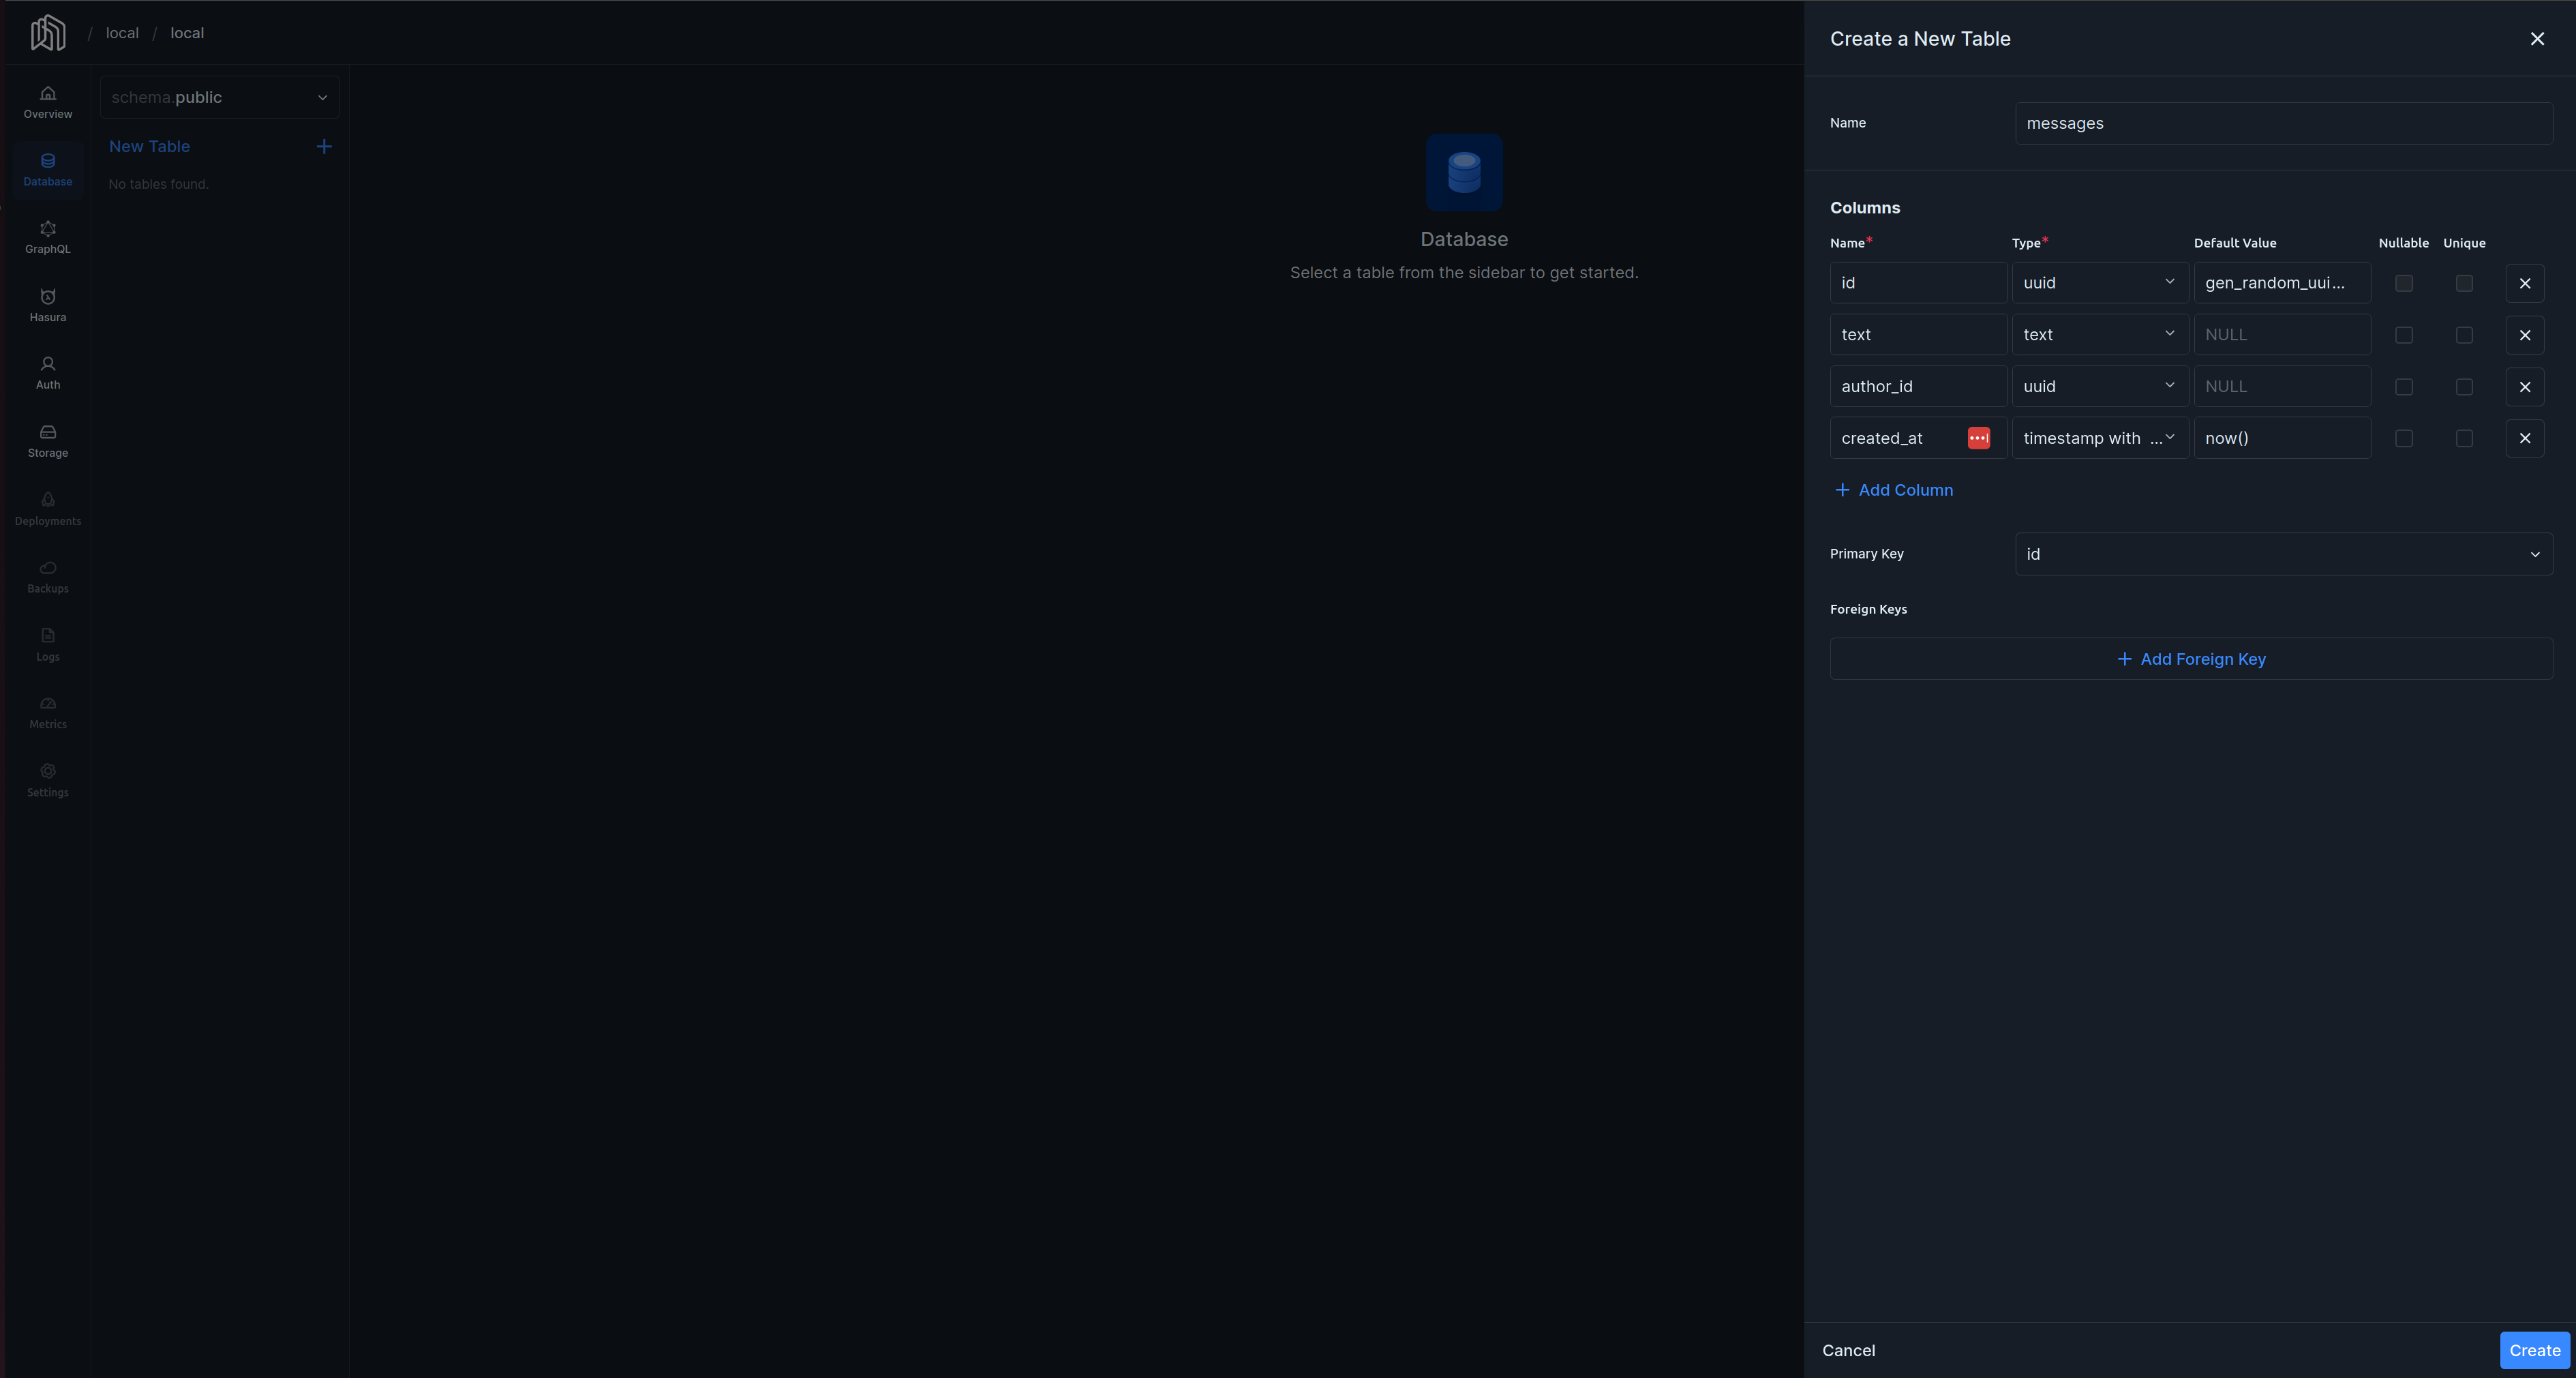
Let’s create a new table calledmessages, with the following columns:
- id (UUID)
- text (Text)
- author_id (UUID)
- created_at (Timestamp)
https://local.dashboard.nhost.run/local/local. Please head to the database tab and add the columns as follows:
 To confirm that the migration was correctly generated with the correct SQL:
Metadata
Metadata is used to track the state of the API, permissions, event triggers, remote schemas, etc. In this guide, we will use permissions to show how metadata is tracked. Again on thedatabase tab of the Nhost Dashboard, click on the 3 dots right next to the table name and choose “Edit Permissions” to open the permissions editor.
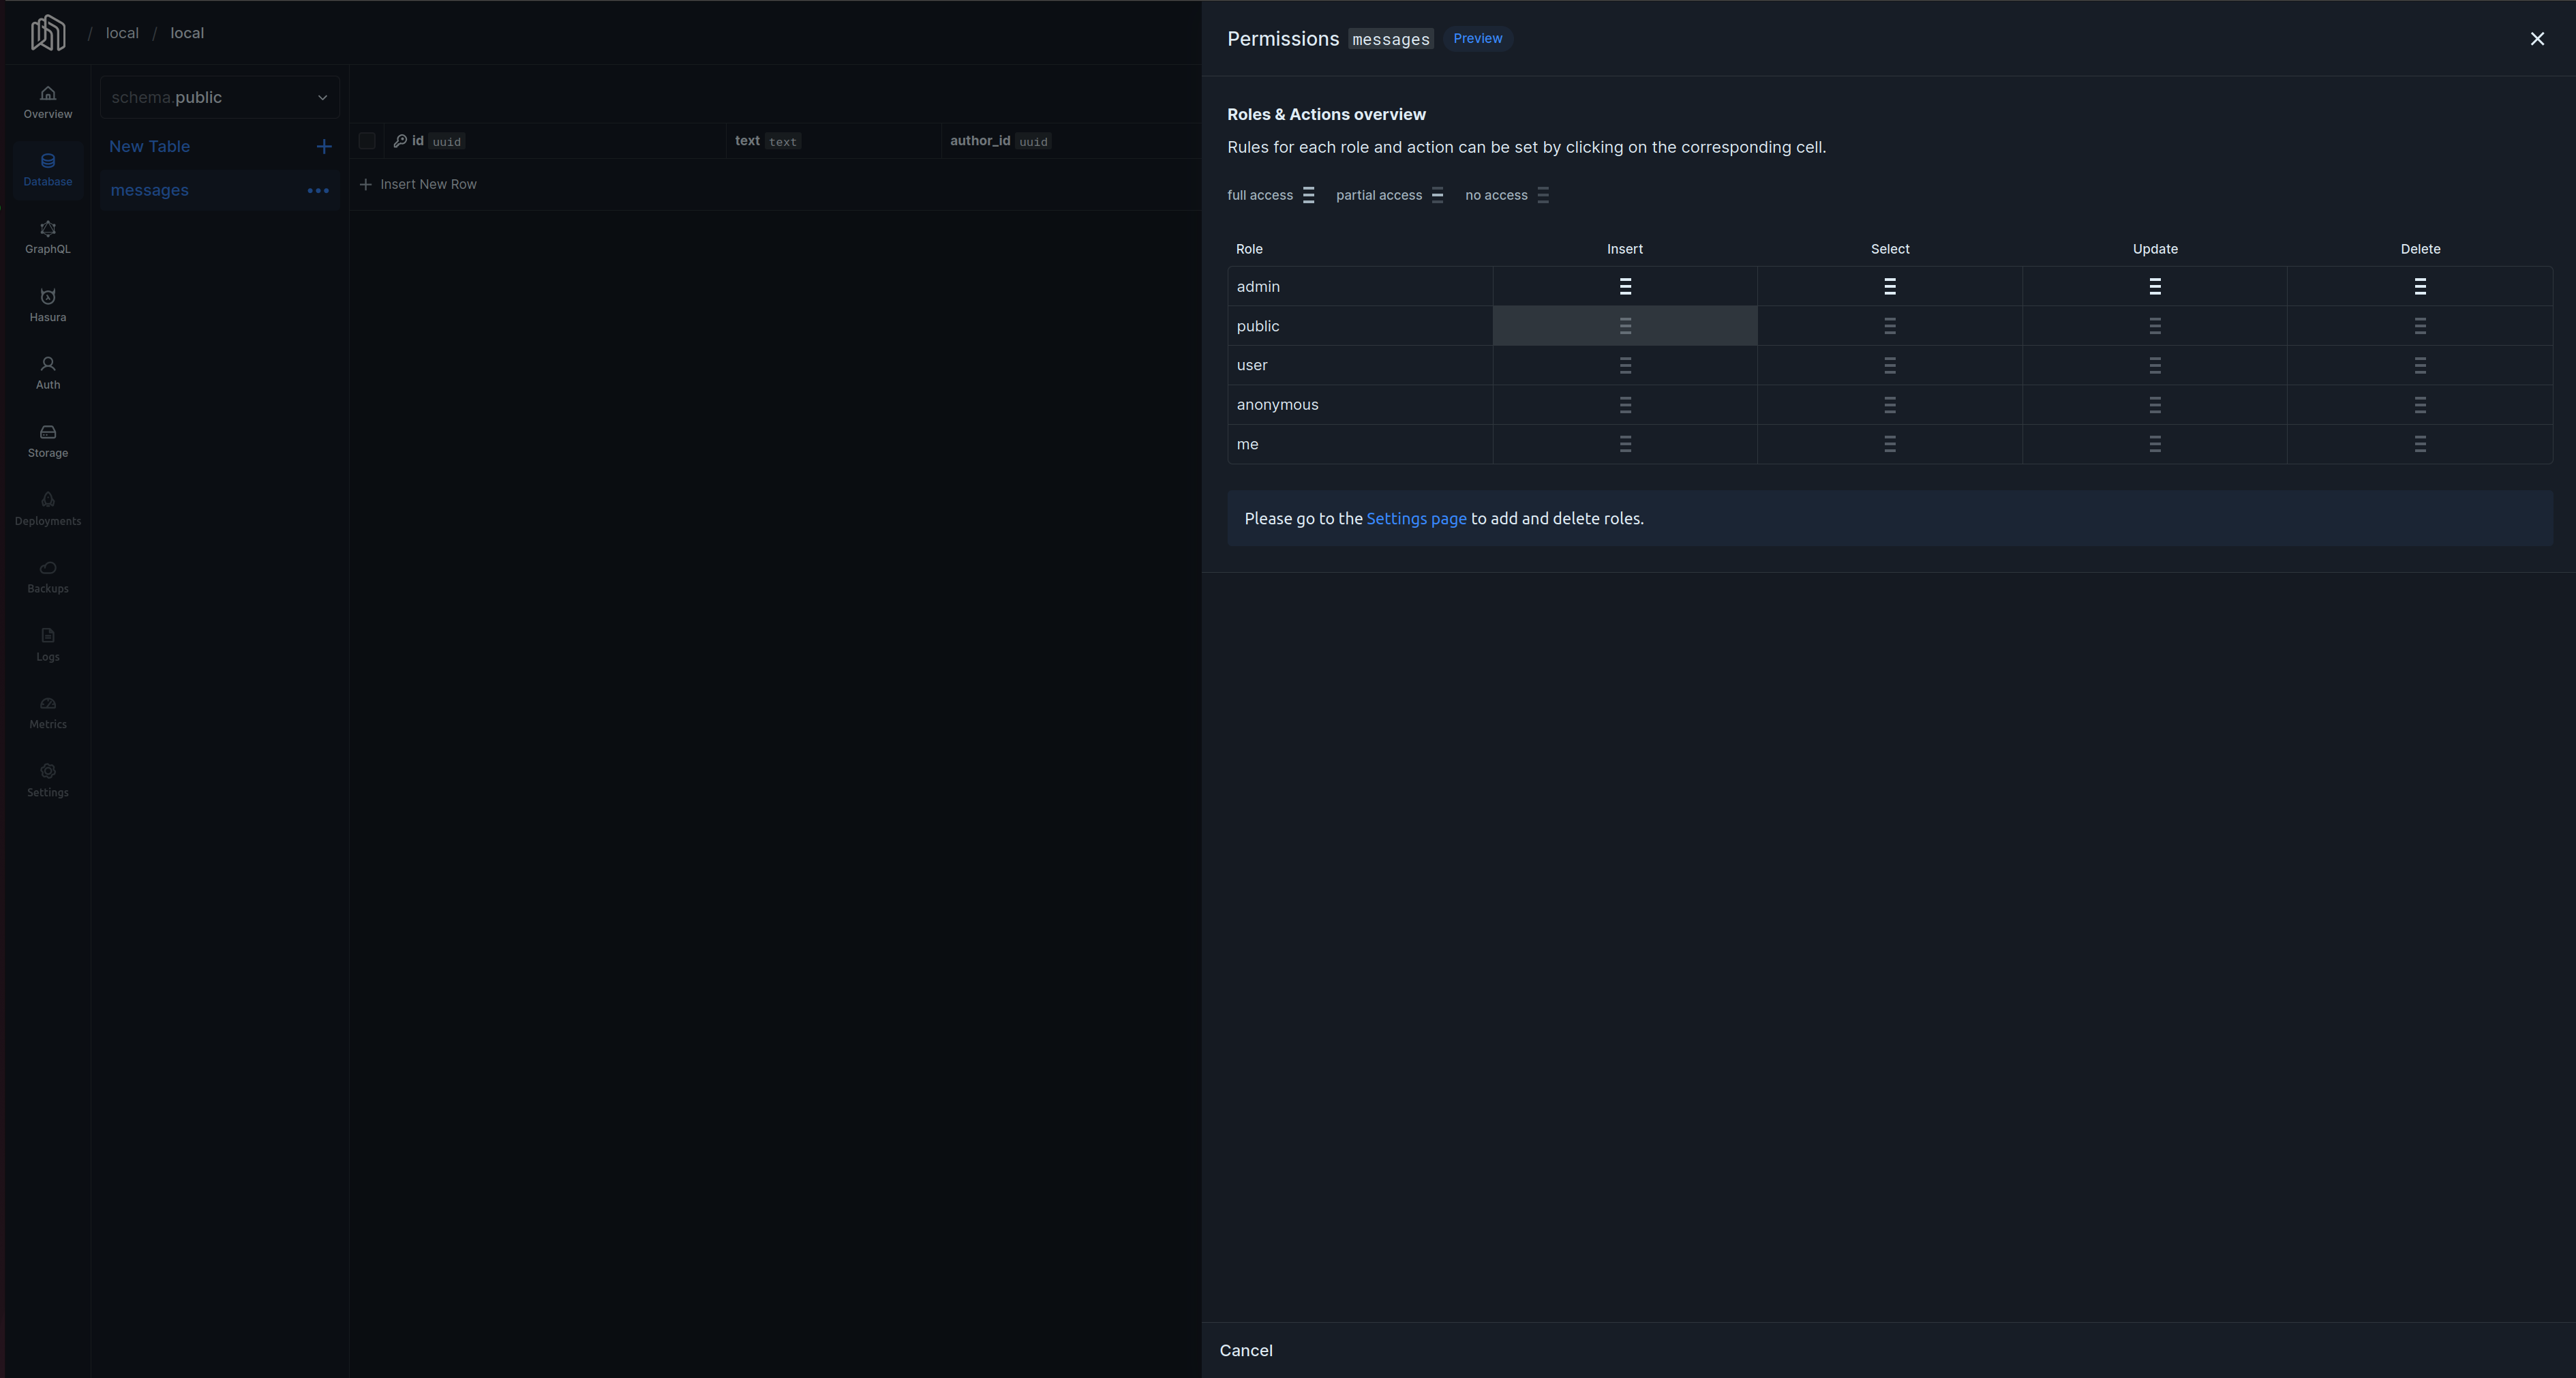 Here we have access to a matrix of permissions for all available roles and actions. We want to set a permission to the
 user role and insert action as follows:
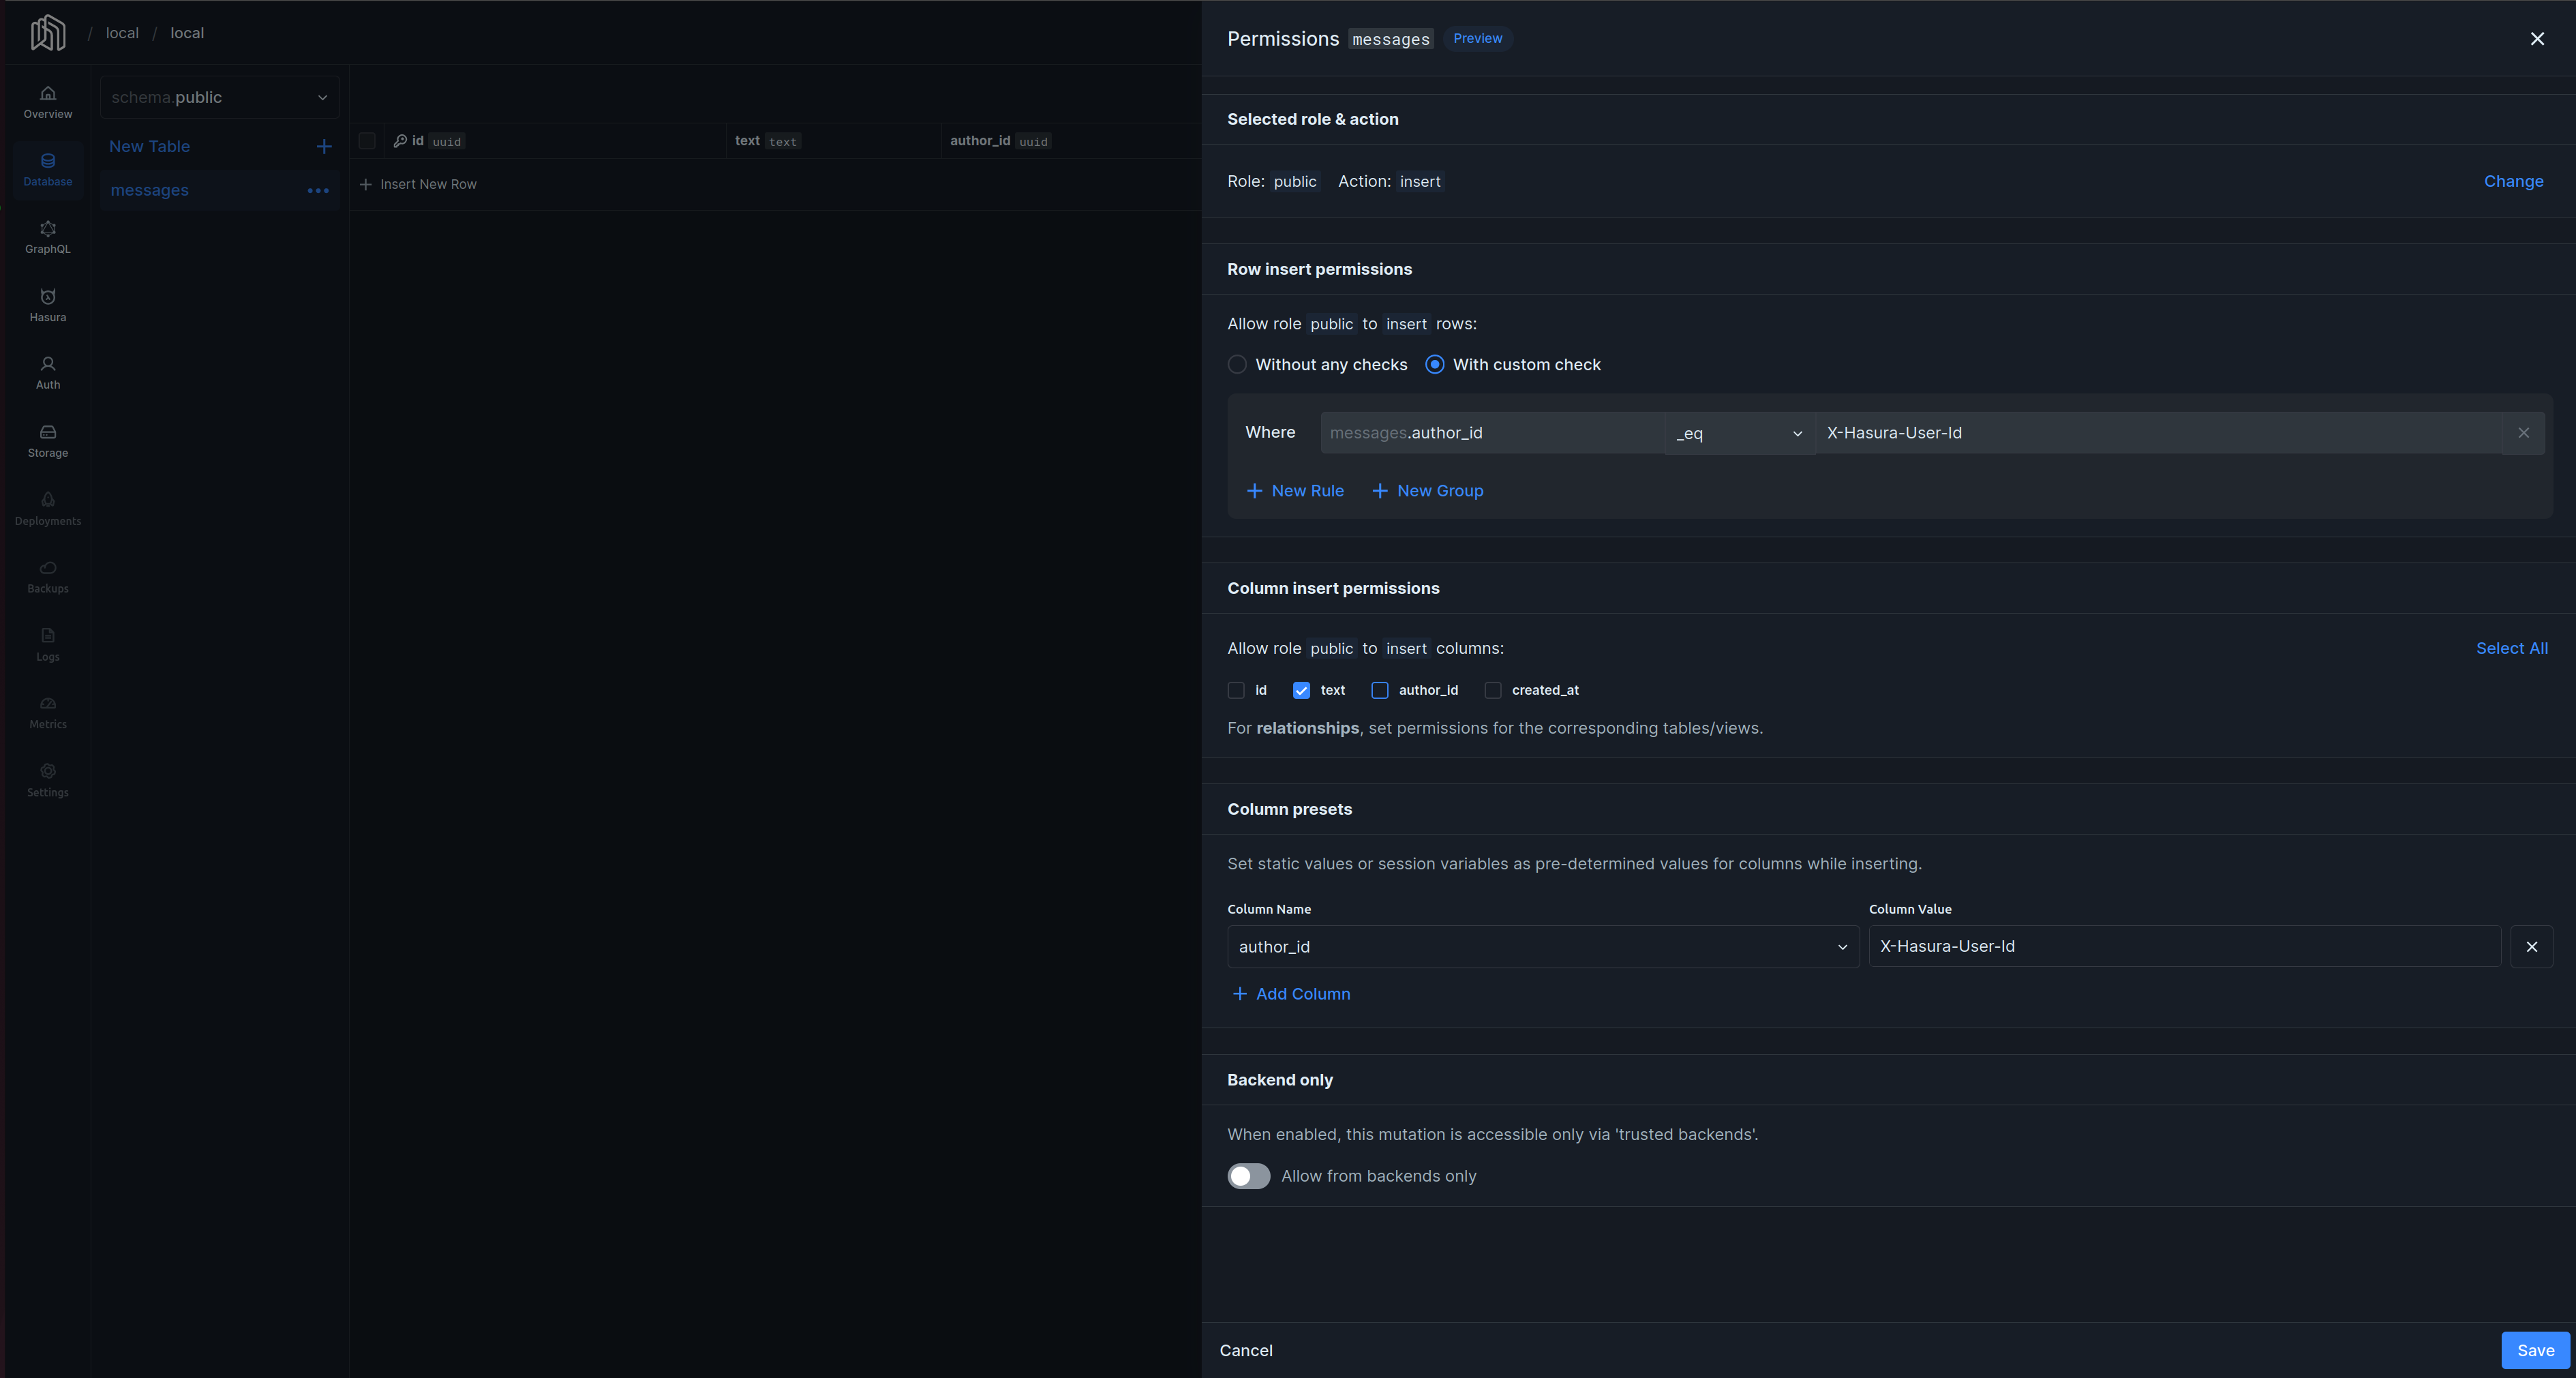 We defined a simple permission to allow a
 user to insert or create messages. We can look at the underlying metadata that tracks it.
Deploy your Project to Nhost
We’ve been developing your project locally, introducing changes via the Dashboard, which in turn creates the actual database migrations and metadata changes that can be properly versioned and tracked. It’s time to deploy your project to the Nhost Platform using Git. If you haven’t already, please head to Nhost and create a project to deploy to. You will also need to connect a GitHub repository to it for automatic deployments with Git.Link your project
It’s time to link, or associate, your local project to the remote one: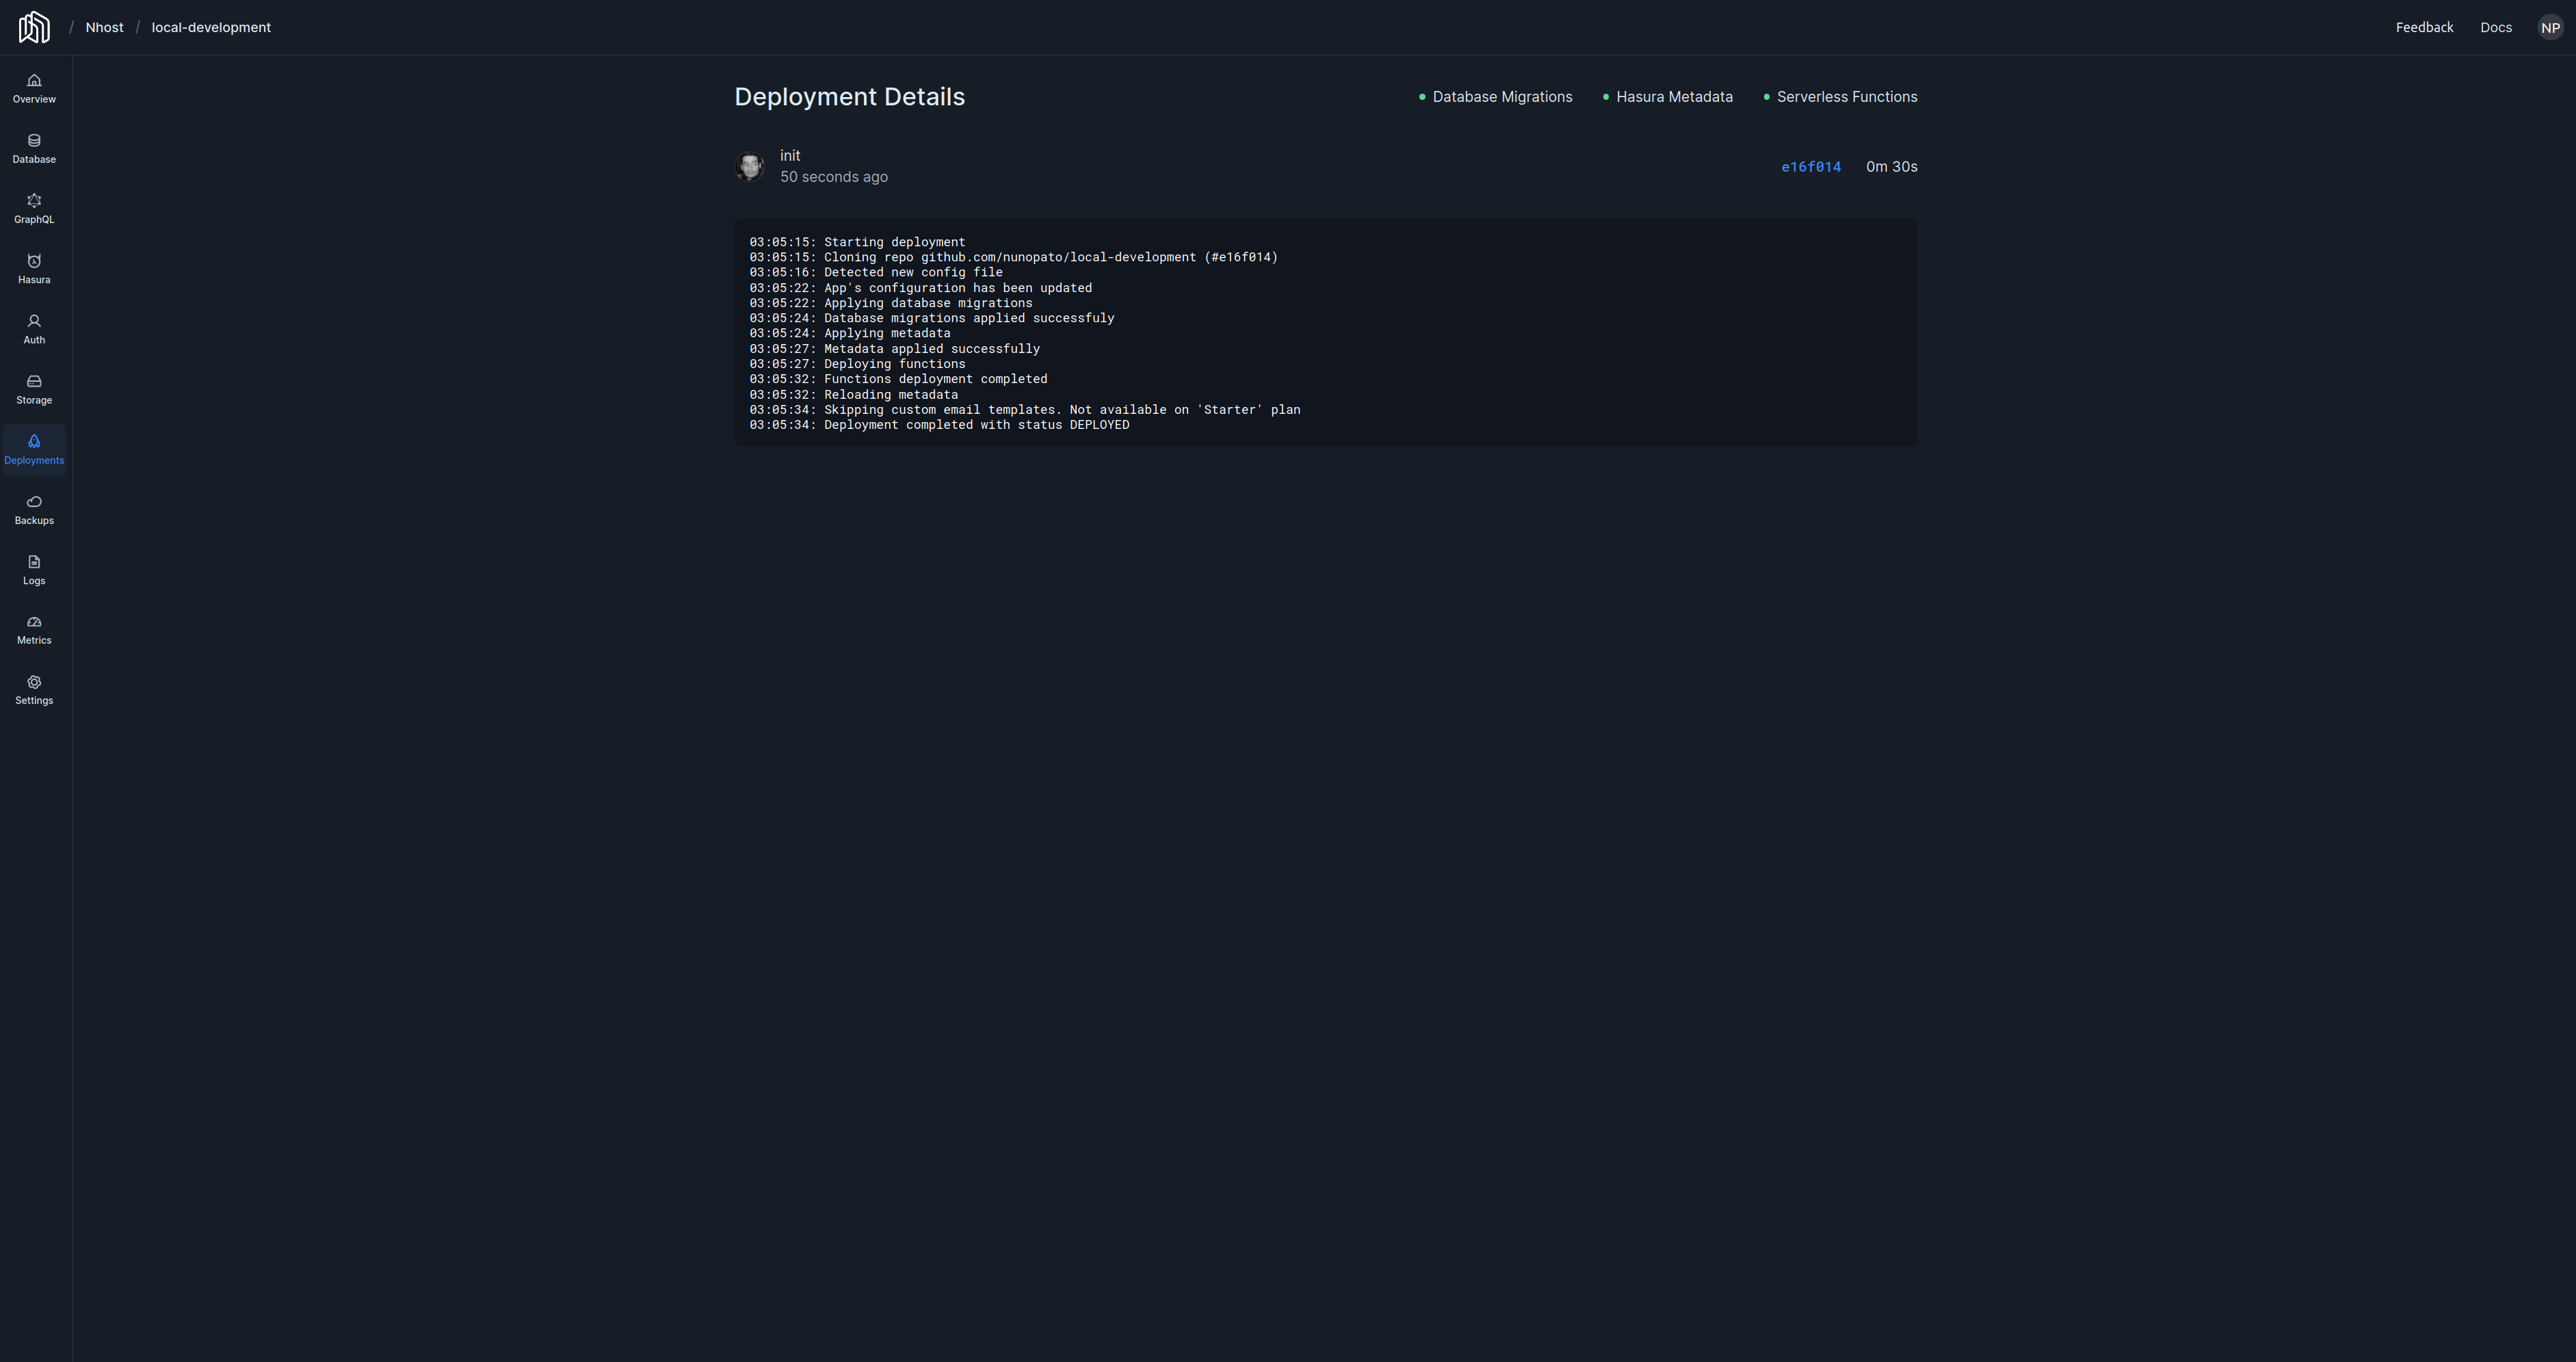 You should now have the same
 messages table (and permissions) on your production instance!